
As the use cases for large language models (LLMs) expand within organizations, data teams are seeing an increasing demand on their time to deliver and support LLMs, often at mass scale. Snowflake Cortex LLM functions enable data teams to do just that, with LLMs that are fully hosted on Snowflake and require no setup.
Coalesce further extends the democratization of LLMs by operationalizing their use with a user-friendly graphical interface, which allows users to focus on the application of the LLMs, rather than writing lines of code. I demoed this functionality at Snowflake’s 2024 Data Cloud Summit as a part of its Dev Day 5-Minute Demo Dare finale, and was honored to win! If you attended Snowflake Summit in person, you can view the video in the Summit portal (login required), or watch a demo-only video I’ll include at the bottom of this article.
Before we dive in, let’s talk a bit about Cortex LLM functions. Snowflake provides support and instant access to large language models that are trained by industry-leading researchers at companies like Mistral, Reka, Meta, and Google. With this powerful, enterprise-grade functionality, Snowflake users can leverage SQL to use any available Cortex function. This means that enterprise-grade AI and ML functionality is fully democratized—and solutions like Coalesce can help operationalize LLM pipelines in minutes.
Since Coalesce is built exclusively for Snowflake, our focus on supporting one platform enables us to rapidly provide support for Snowflake functionality so our customers can take advantage of new Snowflake features almost as soon as they become available. This is no less true when it comes to supporting Snowflake Cortex LLM functions. Coalesce users can begin using Cortex functions by simply installing the Cortex package (now available in Coalesce Marketplace) into their Coalesce workspace and immediately begin building powerful ML and AI features into their data pipelines using these nodes.

With the Cortex package installed, Coalesce users will have access to several different AI/ML nodes. The rest of this article will be exploring Cortex LLM functionality, so we will be looking specifically at the Cortex Functions node type.
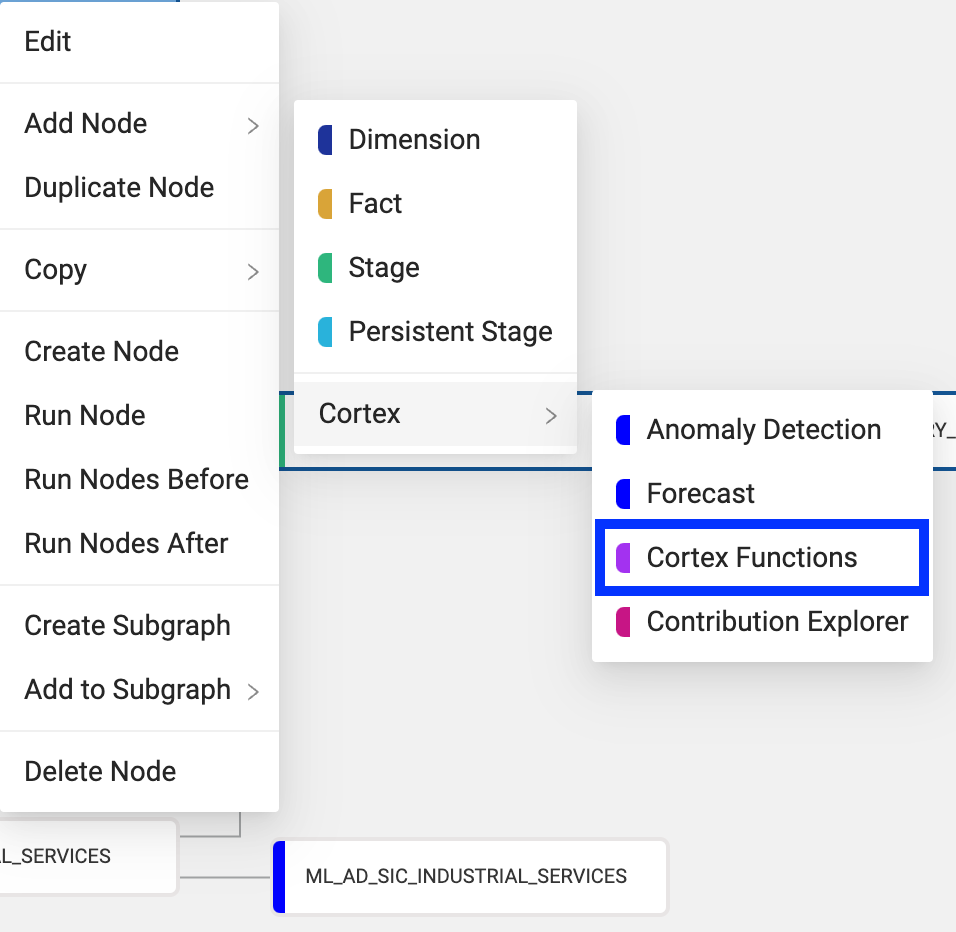
The Cortex Functions node type allows users to take advantage of enterprise-grade LLM functionality without having to write, or even understand, the complexities of the underlying code within Snowflake. Instead, they can focus on what type of LLM application they are solving for and the optimal business logic configuration for their use case, and let Coalesce handle the creation of the Cortex functions behind the scenes. As usual, the user will still have access to all the code that is automatically generated, which we’ll see later in this article.
Let’s build out a simple data pipeline that leverage Cortex LLM functions to see what this looks like. In this case, we’ll be taking some fictional call transcript data in different languages (German, French, and English), translating each transcript to English, creating a sentiment score for the conversation in each transcript, extracting the customer name from the transcript, and creating a summary of the transcript for our customer service team. Let’s see how to do this!
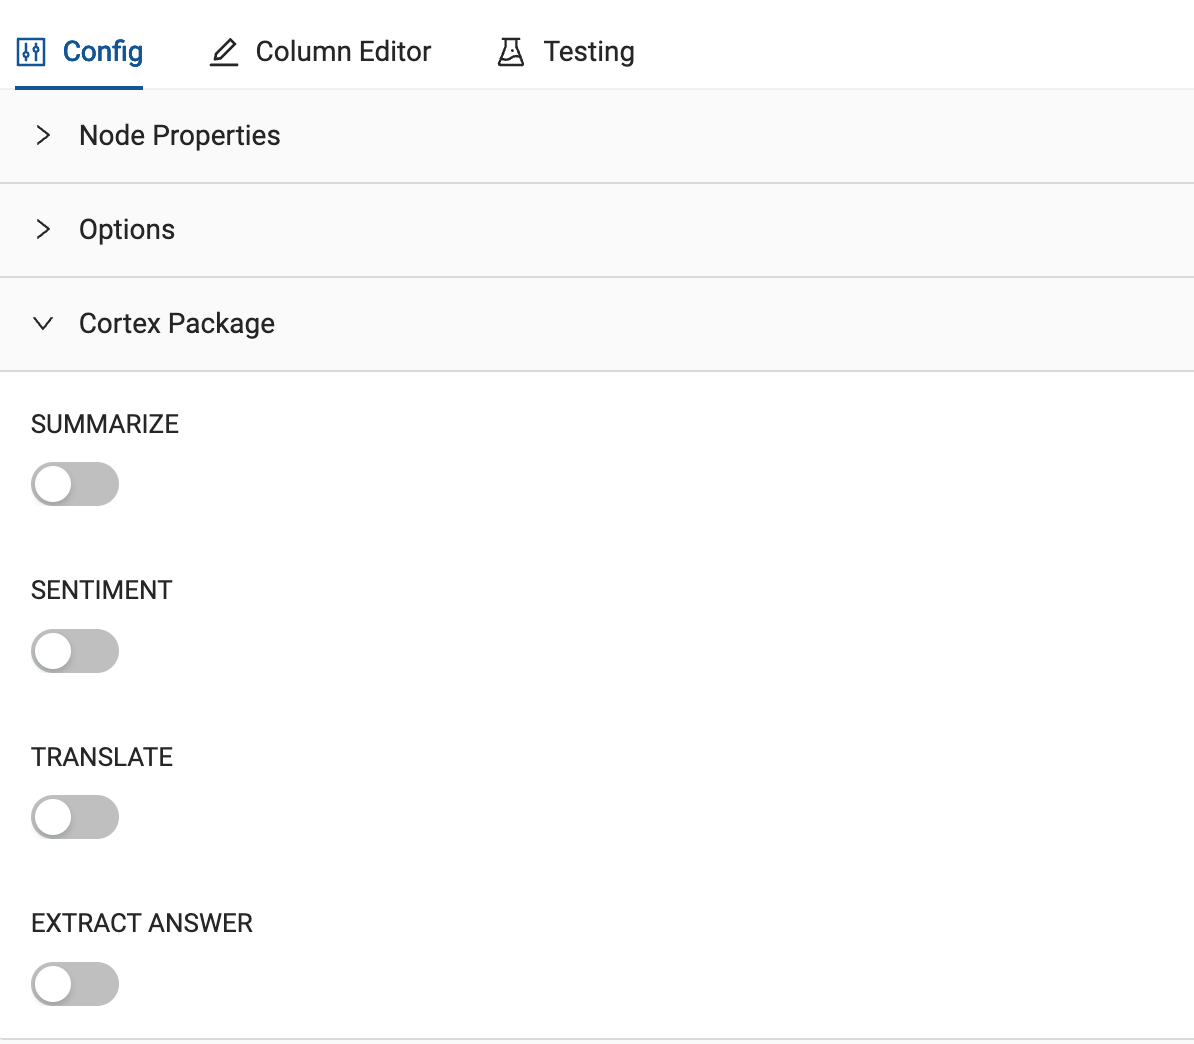
Within the Cortex Functions node, the LLM functionality available to be used is located in the Cortex Package dropdown within the Configuration settings of the node.
Translate transcripts to English
For the first exercise of this node type, we’re going to translate the column that contains our call transcripts in different languages into English. In this case, the column name is Call_Transcript. To perform this translation, we can toggle on the TRANSLATE toggle in the node, and pass through the column we wish to translate. Next, we will pass through the language we wish to translate from, to the language we wish to translate to. In this case, from German (de) to English (en).

Without the user writing a single line of code, Coalesce will now create a table in Snowflake, that passes through the values we supplied in the interface to the functions needed within Snowflake. The user doesn’t need to understand the syntax of the functions, or—if the functions require a multi-step process—how the process works. Additionally, Coalesce exposes the exact code run within Snowflake, and in the case of this translation, looks like this:

Unify translated data sets
Once the German and French data has been translated, we can union together both data sets so that we have a unified table that contains all of the call transcripts. From here, we can add another Cortex Function node in Coalesce, and apply several functions at once.
Apply Cortex LLM functions
First, we will duplicate the Call_Transcript column twice (one for our sentiment, and one for our customer name extraction), so that we have three separate CALL_TRANSCRIPT columns. We’ve added the use case for each column as a suffix to the column name so that the mapping grid will look something like this:

Extract the customer name
Using the Cortex Package configuration settings, we can begin passing these columns through to each function we want to use. Let’s start with the EXTRACT ANSWER function. For this use case, we want to extract the customer name from the call transcript that we have just translated. To do this, we will toggle on the EXTRACT ANSWER toggle and pass through the CALL_TRANSCRIPT_CUSTOMER column that we just created. Next, we can ask any question about our data. In this case, we will ask, “who is the customer?”
Additionally, you will see there is a footnote stating that the data type for the target column of this function must be an array. In the mapping grid, we will change the data type from VARCHAR to ARRAY. The configuration of the node should look something like this:

Create the sentiment score
Next, we want to perform a sentiment analysis on the call transcript. This is where the second duplicated column comes into play. By toggling on the SENTIMENT toggle, we can pass through the CALL_TRANSCRIPT_SENTIMENT column, and that’s it. It’s that easy. Coalesce will pass through the column into the Cortex LLM sentiment function without you, the user, needing to understand how to configure the function or how to operationalize it as a part of your broader pipeline.

Summarize the transcript
Finally, we will use the original column CALL_TRANSCRIPT and summarize the conversation using the SUMMARIZE function. This is also incredibly straightforward, as all you have to do is toggle on the SUMMARIZE toggle and pass through the column name.

After configuring the node this way, we can create the object in Snowflake by selecting the Create button, which will run the DDL to create the object. After this, we can select Run, which will automatically generate the code to run the Cortex LLM functions using the parameters that we configured within the interface.

And just like that, we have easily applied and can now easily manage Cortex LLM functions through Coalesce, without writing a single line of code. From here, we can add additional tables or views on top of this data to allow our data team to gain insights more easily and significantly faster than ever before. In this case, we’ll add a fact node.

Derive JSON mappings
Within the fact node, we can use built-in JSON parsing to extract the customer name from the CALL_TRANSCRIPT_CUSTOMER column, which currently contains an array value. By doing this, Coalesce will break out the key pair values in the array as their own columns, allowing us to have the customer name in a single column. This allows us to analyze the data around sentiment directly with the customer name we now have access to.

Once we have developed the data pipeline in a way that is serving the business needs, we can deploy the pipeline to production, and continue to easily manage all of the Cortex LLM functionality through a singular interface that allows everyone in your organization to leverage the power of Snowflake LLM capability.
See all this in action in the five-minute demo below, or contact us for a custom demo to learn more about everything Coalesce has to offer.
